
Jon boats are workhorses, flat-bottomed, stable, and affordable. But straight from the factory, they’re basically floating metal pans with bench seats. Adding a custom deck changes everything. It gives anglers a stable casting platform, conceals gear storage, and turns a bare-bones hull into a versatile fishing rig. Building a deck isn’t complicated, and it doesn’t require a boat shop. With basic carpentry skills, common materials, and a free weekend, most DIYers can tackle this project in their driveway. This guide covers material choices, construction steps, and layout ideas to help transform a simple jon boat into a functional fishing platform.
Table of Contents
ToggleKey Takeaways
- A jon boat deck adds a stable casting platform, reduces noise, creates hidden storage, and improves resale value without requiring professional boat shop services.
- Marine-grade plywood decking is the most budget-friendly option at $50–$80 per sheet and easy for DIYers, but aluminum diamond-plate is more durable and maintenance-free despite higher upfront costs.
- Building a basic jon boat deck for the bow or stern is a manageable weekend project that requires only standard carpentry tools, pressure-treated lumber, stainless steel fasteners, and proper sealing with marine sealant.
- Non-slip surfaces like outdoor carpet or EVA foam, rod holders, weatherstripped hatches, and an anchor locker are essential features that transform a basic platform into a functional fishing rig.
- Proper surface finishing with outdoor carpet, EVA foam, or deck paint is critical for traction and UV protection, and sealing all plywood edges with spar urethane or epoxy prevents water damage and delamination.
Why Add a Deck to Your Jon Boat?
A deck solves several practical problems that come with stock jon boats. The ribbed aluminum floor is noisy, every dropped lure or footstep echoes across the water and spooks fish. A deck dampens sound and provides a flat, non-slip surface for safer footing, especially in early morning dew or after a rain.
Decking also creates enclosed storage underneath. Batteries, tackle boxes, life jackets, and anchors can be tucked away but remain accessible through hinged hatches. This keeps the boat organized and prevents gear from sliding around during transport or rough water.
For anglers, a raised deck improves sight-fishing. Standing on a platform 8–12 inches above the hull gives a better view into shallow water, making it easier to spot bass beds, redfish tailing, or structure. It’s a major advantage in flats fishing or tight creek channels.
Finally, a custom deck adds resale value. A well-built platform shows the boat has been maintained and upgraded thoughtfully. It’s a selling point that separates a modified rig from a bare hull.
Popular Jon Boat Deck Materials and Their Pros and Cons
Choosing the right decking material comes down to weight, durability, and budget. The two most common options are marine-grade plywood and aluminum, each with distinct trade-offs.
Marine-Grade Plywood
Marine-grade plywood is the go-to for most DIY jon boat decks. It’s lightweight, affordable, and easy to cut with standard woodworking tools. Look for ACX or better exterior-rated plywood in ½-inch or ¾-inch thickness. True marine plywood (often labeled BS 1088) has no voids and uses waterproof glue, but it’s pricey and overkill for freshwater use.
Plywood decks require proper sealing. After cutting, coat all edges and surfaces with marine-grade spar urethane or epoxy resin. Some builders wrap the plywood in fiberglass cloth and resin for added protection, though this adds weight and complexity. Top the deck with outdoor carpet, EVA foam sheets, or rubberized deck paint for traction and UV resistance.
Pros: Low cost (around $50–$80 per 4×8 sheet), easy to work with, plenty of woodworking project tutorials available for beginners.
Pros: Low cost (around $50–$80 per 4×8 sheet), easy to work with, plenty of online build guides.
Cons: Requires regular maintenance and resealing every 1–2 years. Even sealed plywood will eventually delaminate if water gets in. Heavier than aluminum.
Aluminum Decking
Aluminum decking or diamond-plate is the premium choice. It’s lightweight, completely waterproof, and virtually maintenance-free. Builders typically use ⅛-inch thick diamond plate or flat sheet aluminum, cut to size and secured with stainless steel or aluminum rivets.
Aluminum doesn’t need sealing, won’t rot, and handles sun and water exposure indefinitely. It also adds minimal weight, critical for small boats with limited capacity. The downside is cost and fabrication. Aluminum sheeting runs $150–$300 per 4×8 sheet depending on thickness and finish, and cutting it requires a metal blade, jigsaw, or plasma cutter. Drilling and riveting aluminum is straightforward, but it’s less forgiving than wood if measurements are off.
Pros: Long-term durability, zero rot risk, lightweight, low maintenance.
Cons: Higher upfront cost, requires metal-cutting tools, hot in direct sun without a coating or mat.
Step-by-Step Guide to Building a Basic Jon Boat Deck
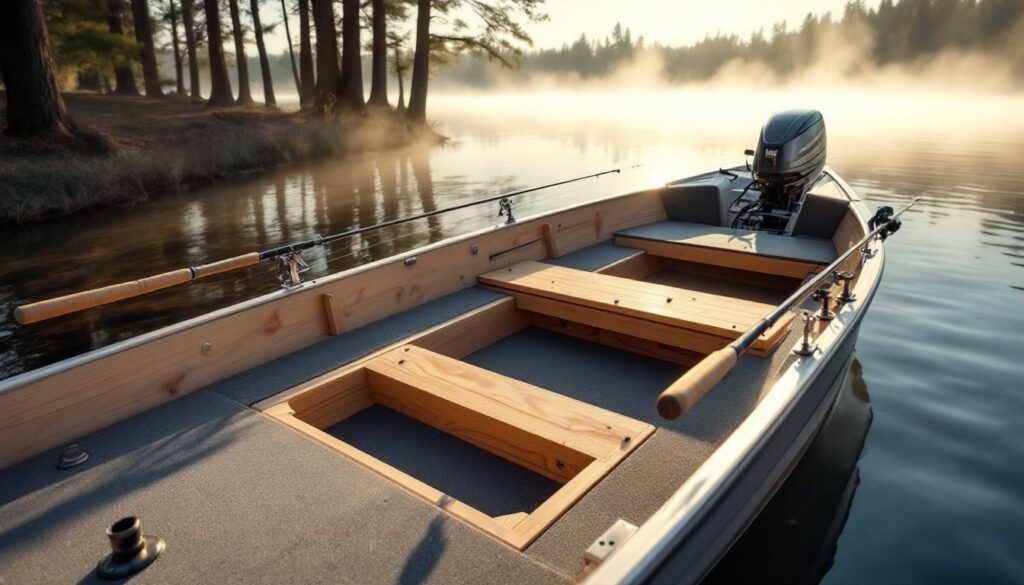
Building a simple front or rear deck is a manageable weekend project. This example covers a front casting deck for a 12–14 foot jon boat. Adjust dimensions to fit your hull.
Materials and Tools:
- ½-inch or ¾-inch marine-grade plywood (one 4×8 sheet)
- Pressure-treated 2×2 or 2×4 lumber for frame supports
- Stainless steel screws (1¼-inch and 2½-inch)
- Marine sealant or polyurethane construction adhesive
- Outdoor carpet, EVA foam, or deck paint
- Piano hinge (for access hatches)
- Circular saw or jigsaw
- Drill with bits
- Measuring tape, pencil, carpenter’s square
- Safety gear: eye protection, gloves, hearing protection
Step 1: Measure and Plan the Deck Frame
Measure the bow section where the deck will sit. Most front decks span from the bow to the first bench seat, roughly 3–5 feet back. Sketch a simple rectangular or tapered frame that follows the hull shape. The frame should rest on the hull’s side ribs and cross braces.
Step 2: Build the Support Frame
Cut pressure-treated 2×2 or 2×4 lumber to create a perimeter frame. Use stainless steel screws and construction adhesive at joints. For additional support, add cross braces every 16–24 inches. The frame should be rigid and level: shim as needed to account for hull irregularities.
Secure the frame to the boat’s existing ribs or benches using stainless screws or bolts. Pre-drill holes to avoid cracking the wood or aluminum. Apply marine sealant to every fastener to prevent leaks.
Step 3: Cut and Fit the Plywood Deck
Lay the plywood over the frame and trace the outline. Cut with a circular saw or jigsaw. Test-fit the piece, it should sit flush with no gaps. Sand edges smooth and seal all cuts with spar urethane or epoxy.
Step 4: Attach the Deck and Add Access Hatches
Secure the plywood to the frame with 1¼-inch stainless screws, spaced every 8–10 inches. Countersink screws slightly. If you want storage access, cut a hatch opening in the plywood and attach it with a stainless steel piano hinge. Add a recessed pull handle or lift ring.
Step 5: Finish the Surface
Cover the deck with outdoor carpet (use marine adhesive), peel-and-stick EVA foam, or rubberized deck paint. This step is critical for traction and UV protection. Let everything cure for 24 hours before launching. Many builders reference DIY furniture plans for hinge and hardware installation techniques.
Creative Deck Layout Ideas for Maximum Functionality
Once you’ve mastered basic deck construction, layout customization makes the boat truly yours. Here are proven configurations:
Full-Length Deck with Center Console: Run decking from bow to stern, leaving a recessed channel in the middle for a center console or trolling motor. This setup is popular for bay boats and maximizes fishable area.
Raised Casting Deck with Storage Boxes: Build a front deck 10–12 inches high with large hinged hatches. Install plastic utility boxes underneath for organized tackle storage. Some anglers add PVC rod holders or a small livewell plumbed into the deck.
Split Deck with Open Middle: Deck the bow and stern, leave the middle open for a bench seat and open workspace. This balances fishing platforms with room to move gear and passengers.
Flip-Up Bow Deck: Hinge the entire front deck so it lifts up for access to an anchor locker or trolling motor batteries. Use gas struts (like those on truck bed covers) to hold it open.
Modular Deck Panels: Build removable deck sections that rest on the frame without permanent fasteners. This allows easy removal for cleaning, transport, or switching between fishing and duck hunting setups. Detailed layout ideas and design inspiration can be found in step-by-step tutorials from experienced boat builders.
Essential Features to Include in Your Jon Boat Deck Design
A functional deck goes beyond a flat surface. These features turn a basic platform into a versatile fishing rig:
Non-Slip Surface: Outdoor carpet is the most common, but EVA foam (like SeaDek or Hydro-Turf) is grippier, more durable, and easier to clean. Avoid smooth paint, it’s a slip hazard when wet.
Rod Holders: Flush-mount rod holders installed in the deck or gunwales keep rods secure and out of the way. Position them within arm’s reach of your casting spot. Use stainless steel or heavy-duty plastic holders rated for freshwater or saltwater depending on your use.
Storage Hatches with Gaskets: Hinged hatches should have rubber weatherstripping or gaskets to keep water and dirt out. Recessed pull handles prevent snagging lines. Size hatches large enough to fit a tackle box or cooler.
Anchor Locker: A dedicated compartment in the bow deck for anchor line and a Danforth or fluke anchor keeps the rope organized and ready. Drill a small drain hole so water doesn’t pool.
Trolling Motor Mounting Surface: If running a bow-mount trolling motor, reinforce the deck edge with extra 2×4 blocking or aluminum angle to handle the motor’s weight and torque. Some designs integrate a recessed motor tray.
Livewell or Cooler Recess: Cut a recess sized for a portable livewell or cooler so it sits flush with the deck. This prevents it from sliding and gives a cleaner look.
Lighting and Electrical Runs: If you fish at night, run 12V LED strip lights under the deck or along the gunwales. Use marine-grade wire and waterproof connectors. Plan wire runs during the framing stage.
Safety Tip: Always wear eye protection when cutting plywood or aluminum, and use a dust mask when sanding treated lumber. Work in a ventilated area when applying sealants or adhesives.
Adding a deck is one of the best upgrades for a jon boat. It’s customizable, affordable, and well within reach of most DIYers with a drill and a saw. Whether building a simple front platform or a full-hull deck system, the result is a quieter, more organized, and more capable fishing rig. Plan the layout, choose materials that fit your budget and skill level, and don’t skip the sealing and finishing steps, they’re what separate a weekend project from a long-lasting upgrade.


