
Fireplace wall sconces do more than light up a room, they frame the hearth, add depth, and turn a functional feature into a focal point. Whether someone’s working with a traditional brick surround or a sleek modern insert, the right sconces create balance and warmth without cluttering the mantel. But picking the wrong size, style, or placement can throw off the whole wall. This guide covers choosing sconces that complement a fireplace’s design, sizing and spacing them correctly, and installing them safely, including wiring, junction box mounting, and when to call an electrician.
Table of Contents
ToggleKey Takeaways
- Fireplace wall sconces frame the hearth and create symmetry while providing task lighting and floor space savings compared to traditional lamps.
- Mount fireplace wall sconces at 60-66 inches from the floor and position them 4-6 feet apart to achieve proper balance and avoid visual clutter.
- Choose scone styles that match your fireplace design—traditional sconces in bronze or brass for brick/stone, minimalist fixtures in matte black or brushed nickel for modern inserts.
- Hardwired sconce installation requires turning off power, marking locations, installing electrical boxes, running wiring, and connecting fixtures—hire an electrician if uncomfortable with live wires or new circuits.
- Pair warm-toned bulbs (2700K) with dimmer switches to transition fireplace wall sconces from bright task lighting to soft ambient glow that complements the hearth.
Why Fireplace Wall Sconces Are a Game-Changer for Your Living Space
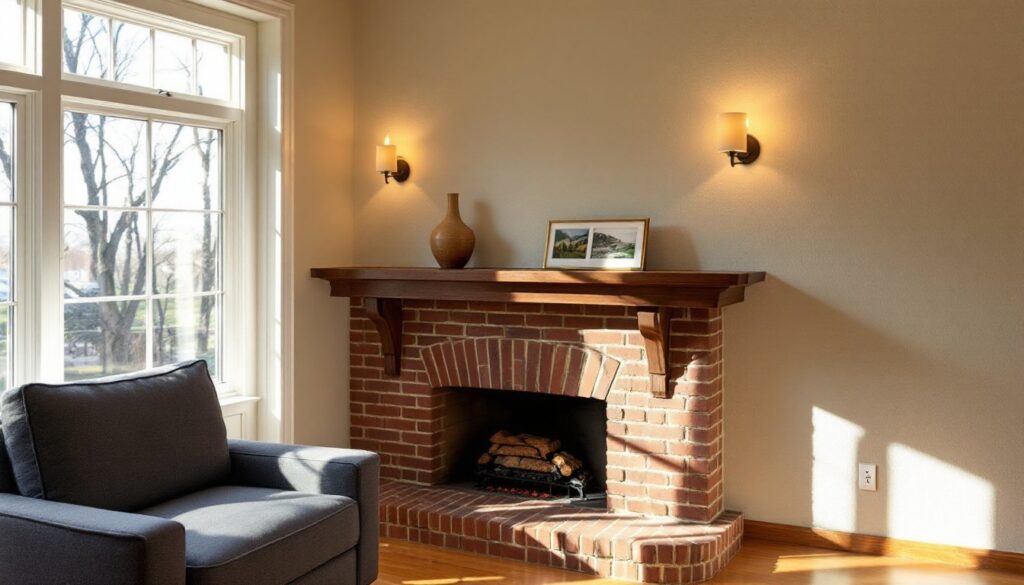
Fireplace wall sconces solve a common layout problem: how to light a room evenly without relying solely on overhead fixtures or lamps that take up floor space. Flanking a fireplace with sconces creates symmetry, which the eye naturally gravitates toward. This setup works especially well in rooms where the fireplace anchors one wall, sconces provide task lighting for reading or conversation while keeping the mantel clear for decor.
Beyond aesthetics, sconces improve functionality. Unlike table lamps, they don’t require side tables or outlets at floor level. Wall-mounted fixtures also keep cords out of sight and reduce clutter around high-traffic areas. In older homes, adding sconces can supplement inadequate ceiling lighting without the cost and mess of rewiring overhead.
From a design standpoint, sconces add vertical interest. A fireplace wall often feels bottom-heavy, especially with low-slung furniture. Mounting sconces at eye level or slightly above draws the gaze upward, making ceilings feel higher. This technique is particularly effective in rooms with standard 8-foot ceilings.
Sconces also offer flexibility in light quality. Many homeowners pair them with dimmer switches, allowing adjustment from bright task lighting to a soft glow for ambiance. Pairing warm-toned bulbs (around 2700K) with sconces creates a welcoming atmosphere that complements firelight without competing with it.
Choosing the Right Style of Wall Sconces for Your Fireplace
Matching sconces to a fireplace’s style keeps the wall cohesive. The wrong design, like ultra-modern sconces on a Colonial mantel, creates visual tension. Here’s how to narrow down fireplace sconces ideas by design era and material.
Traditional and Rustic Sconce Designs
For brick fireplaces, stone surrounds, or wood mantels, traditional sconces in oil-rubbed bronze, aged brass, or wrought iron reinforce the hearth’s warmth. Candle-style sconces with curved arms or lantern-style fixtures with seeded glass suit Colonial, Craftsman, and farmhouse interiors. These designs often feature visible hardware, think scrollwork, hammered metal, or chain detailing, that adds texture without overwhelming the space.
Rustic sconces pair well with reclaimed wood mantels or exposed beam ceilings. Look for fixtures with Edison bulbs, metal cages, or barn-style shades. Materials like blackened steel or distressed wood complement stone or brick without feeling too polished. Avoid overly ornate designs here, rustic style leans functional, not fussy.
For rooms with high-end interior design influences, crystal or glass sconces with antique finishes can elevate a traditional fireplace without veering into gaudy territory. These work best in formal living rooms or dining rooms where the fireplace serves as a statement piece.
Modern and Minimalist Options
Contemporary fireplaces, especially linear gas inserts or smooth plaster surrounds, call for minimalist sconces with clean lines. Wall-mounted swing-arm fixtures in matte black, brushed nickel, or polished chrome keep the look uncluttered. Globe sconces with frosted glass or cylindrical metal shades provide even light distribution without busy detailing.
For industrial-leaning spaces, exposed-bulb sconces with simple backplates work well. Choose fixtures where the bulb itself becomes the design element, vintage-style LED filament bulbs mimic the look of Edison bulbs but use a fraction of the energy (typically 4-8 watts versus 40-60 for incandescent).
Mid-century modern rooms benefit from sconces with geometric shapes, think cones, spheres, or asymmetrical arms. Brass or walnut accents tie into period furniture without requiring a full vintage set. Avoid overly trendy finishes like rose gold, which can date quickly.
Placement and Sizing Tips for Fireplace Wall Sconces
Poor placement is the fastest way to ruin otherwise great sconces. Too high, and they feel disconnected from the fireplace. Too low, and they compete with mantel decor or create glare at eye level. Here’s how to get it right.
Height: Mount sconces so the center of the fixture sits between 60 and 66 inches from the floor. This range works for most ceiling heights and furniture layouts. If the homeowner is tall or the room has high ceilings, aim for the upper end. In rooms with 8-foot ceilings, stay closer to 60 inches to avoid crowding the ceiling line.
Horizontal spacing: Position sconces 4 to 6 feet apart, measured from center to center. For a standard fireplace (around 3 to 4 feet wide), this usually means placing each sconce 6 to 12 inches beyond the outer edge of the mantel or surround. If the fireplace is wider, say, a floor-to-ceiling stone installation, increase spacing proportionally to maintain balance.
Symmetry matters. Use a laser level or chalk line to mark sconce positions on both sides of the fireplace. Eyeballing it leads to lopsided installations that are immediately noticeable. Measure from the same reference point on each side, typically the centerline of the fireplace or the outer edge of the mantel.
Scale the fixture to the wall. Sconces should be proportional to the fireplace and surrounding furniture. For a fireplace with a 5-foot mantel, sconces with 10- to 14-inch-wide shades or backplates work well. Smaller fireplaces (under 3 feet) pair better with compact fixtures in the 6- to 8-inch range. Oversized sconces on a narrow wall feel cartoonish: tiny fixtures get lost on a large stone surround.
Avoid conflict with artwork or mirrors. If a large mirror or piece of art hangs above the mantel, make sure sconces don’t cut across it visually. Either mount them below the bottom edge or far enough to the sides that they frame the piece rather than interrupt it. For design sourcebooks covering fireplace layouts, this spacing rule appears repeatedly.
Installing Fireplace Wall Sconces: A Step-by-Step DIY Guide
Installing hardwired sconces requires basic electrical skills and attention to local code. If the homeowner isn’t comfortable working with live wires or if the project involves running new circuits, hire a licensed electrician. Many jurisdictions require a permit for new electrical work, and insurance claims can be denied if unpermitted DIY work causes a fire.
Tools and materials needed:
- Voltage tester (non-contact or two-lead)
- Stud finder (magnetic or electronic)
- Drywall saw or keyhole saw
- Wire strippers and wire nuts
- Screwdriver set (flathead and Phillips)
- Drill with bits for wood and masonry (if mounting to brick or stone)
- Electrical boxes (old-work boxes for drywall, masonry boxes for brick)
- 14/2 or 12/2 NM cable (Romex) if running new wire
- Wall anchors (toggle bolts or masonry anchors, depending on wall type)
- Safety gear: safety glasses, work gloves, dust mask if cutting into masonry
Step 1: Turn off power and verify.
Locate the breaker controlling the circuit where the sconces will connect. Flip it off, then use a voltage tester at the nearest outlet or switch to confirm power is dead. Never assume a breaker is labeled correctly.
Step 2: Mark sconce locations.
Use the measurements from the previous section (60-66 inches high, 4-6 feet apart). Mark the center of each sconce location with a pencil. Use a stud finder to check for studs, plumbing, or electrical runs behind the wall. Avoid drilling into these.
Step 3: Install electrical boxes.
For drywall, use old-work electrical boxes (also called cut-in or retrofit boxes). Trace the box outline at each mark, then cut openings with a drywall saw. For brick or stone, drill into mortar joints with a masonry bit and mount metal boxes with masonry anchors or toggle bolts rated for the fixture weight. Most sconces weigh 2-5 pounds: check the manufacturer’s specs.
Step 4: Run wiring.
If tapping into an existing circuit, fish 14/2 NM cable from the nearest junction box or switch to each sconce location. For plaster walls or finished spaces, this may require cutting access holes and patching later. If running a new circuit from the panel, consult the National Electrical Code (NEC) for wire gauge and circuit amperage, most lighting circuits use 15-amp breakers with 14-gauge wire. Some inspectors require 12-gauge.
Strip about 6 inches of outer sheathing from the cable and 3/4 inch of insulation from each wire (black, white, and bare copper). Feed the cable into the box, leaving 6-8 inches of wire extending out.
Step 5: Connect the sconce.
Most sconces have three wires: black (hot), white (neutral), and green or bare copper (ground). Connect black to black, white to white, and ground to ground using wire nuts. Twist wires together clockwise before threading the nut on, then tug gently to confirm a solid connection. Tuck wires into the box, being careful not to pinch them.
Step 6: Attach the mounting bracket and fixture.
Screw the mounting bracket (included with the sconce) to the electrical box. Align the sconce’s base plate over the bracket and secure with the provided screws. Some designs use a center post and cap nut instead.
Step 7: Install bulbs and test.
Screw in the appropriate bulbs, check the fixture’s maximum wattage rating, typically 60 watts for incandescent or equivalent LED (around 9-12 watts). Turn the breaker back on and flip the switch. If the sconce doesn’t light, turn off power and recheck wire connections.
Step 8: Add dimmer switches (optional).
For adjustable lighting, replace the standard switch with a dimmer compatible with LED bulbs if using LEDs. Not all dimmers work with all bulbs: mismatched components cause flickering or buzzing. Popular architecture trends in 2026 favor smart dimmers that integrate with voice assistants or apps, allowing remote control and scheduling.
Safety notes:
- Always wear safety glasses when drilling or cutting.
- If working near a gas fireplace, ensure all gas lines are clearly identified and avoided.
- In bathrooms or near fireplaces where moisture or heat are present, use fixtures rated for damp or high-temperature locations.
- If unsure about any step, especially working inside the breaker panel, call a professional. Electrical work done incorrectly is a fire and shock hazard.
Conclusion
Fireplace wall sconces bring balance, light, and style to one of the room’s most important walls. Getting the placement and sizing right makes the difference between a polished look and a cluttered one. For DIYers comfortable with basic wiring, installation is straightforward, just respect local codes, test thoroughly, and don’t skip the voltage tester. When in doubt, hire an electrician. The result is a space that feels intentional, functional, and ready for years of use.


