
The farmhouse kitchen island has evolved from a utilitarian worksurface into a statement piece that defines the entire room. It’s the spot where meal prep, assignments, and coffee conversations all happen, so it needs to deliver on storage, workspace, and visual impact. Whether you’re renovating a century-old home or adding rustic character to a newer build, the right island design can anchor your kitchen with warmth and practicality. This guide covers materials, styles, and DIY options that bring authentic farmhouse charm without sacrificing modern function.
Table of Contents
ToggleKey Takeaways
- A farmhouse kitchen island combines natural materials, visible craftsmanship, and authentic details like exposed joinery and hand-forged hardware to anchor your kitchen with warmth and practicality.
- Reclaimed wood brings instant authenticity to islands while reducing waste, but requires inspection for structural integrity and finishing with matte polyurethane or hard wax oil to preserve patina.
- Butcher block countertops are the quintessential farmhouse choice, offering warm aesthetics and repairability when finished with food-safe mineral oil and installed with expansion-friendly fasteners instead of adhesive.
- Modern storage features like soft-close drawers, pull-out spice racks, and deep dividers can be combined with vintage-inspired design elements such as inset doors and oil-rubbed bronze hardware for authentic function.
- DIY farmhouse island projects using stock cabinets, 2×4 frames with beadboard cladding, or repurposed furniture can be completed for $200–$400, delivering custom character without a custom price tag.
- Maintain 42–48″ of clearance on all working sides for code compliance, and verify permit requirements before adding plumbing or electrical to your island.
What Makes a Kitchen Island Feel Farmhouse?
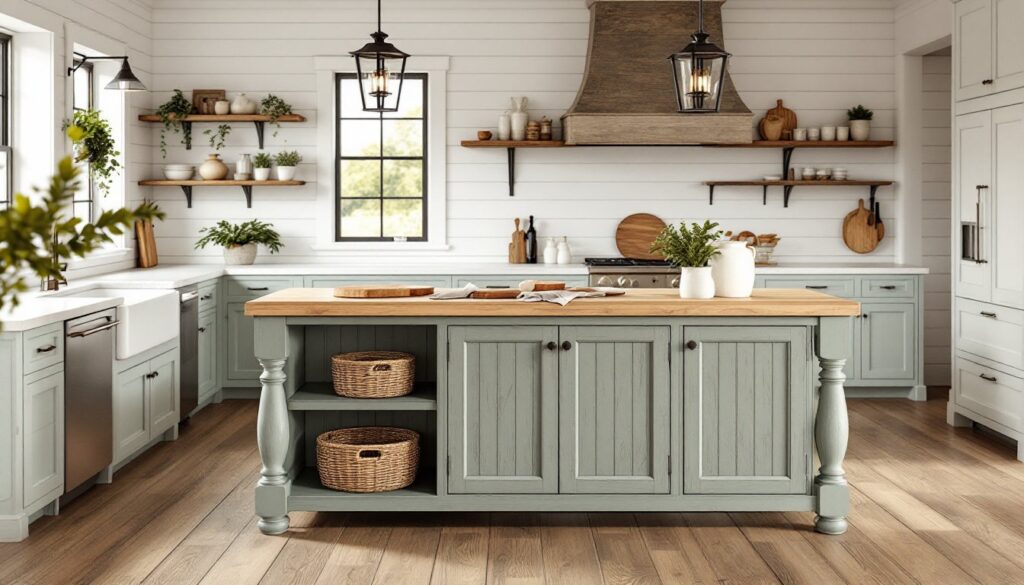
Farmhouse style centers on natural materials, visible craftsmanship, and a lived-in feel that balances polish with patina. A true farmhouse island doesn’t look like it rolled off a showroom floor, it has character built in through wood grain, hand-forged hardware, or paint that shows brush strokes.
Key design elements include:
• Exposed joinery or turned legs instead of flush cabinet panels
• Natural wood finishes (especially oak, pine, or reclaimed barn wood)
• Neutral or muted paint colors like cream, sage, navy, or weathered gray
• Open lower shelves for baskets, crocks, or everyday dish storage
• Countertop contrast, butcher block, soapstone, or honed marble paired with painted bases
• Vintage-inspired hardware (bin pulls, cup handles, latches)
Dimensionally, farmhouse islands tend to be substantial, at least 36″ deep and 60″ long if space allows. They often include overhangs for seating (12–15″ is standard for knee clearance with stools). If you’re adding an island to an existing kitchen, maintain 42–48″ of clearance on all working sides to meet code and avoid bottlenecks.
Avoid overly sleek materials like high-gloss lacquer, frameless cabinetry, or waterfall edges, they read contemporary, not farmhouse. Instead, lean into texture, visible wood, and details that suggest the piece has a story.
Reclaimed Wood Islands for Rustic Warmth
Reclaimed wood brings instant authenticity. Salvaged barn siding, old floor joists, or deconstructed fence boards carry nail holes, saw marks, and color variation that new lumber can’t replicate. Using reclaimed material also reduces waste and adds a sustainability angle to your project.
Structural considerations: If you’re building a base from reclaimed lumber, check for rot, insect damage, and structural integrity. Old wood can be brittle or dimensionally inconsistent. You’ll often need to plane and sand surfaces to remove splinters and achieve a workable thickness. A thickness planer is ideal: if you don’t own one, many lumberyards or makerspaces offer milling services.
For the frame, use new dimensional lumber (2×4s or 2×6s) for legs and supports, then clad the exterior with reclaimed boards. This keeps the island stable and code-compliant while showcasing the weathered wood where it counts.
Finishing reclaimed wood: Skip heavy stains that obscure the patina. A clear matte polyurethane or hard wax oil (like Rubio Monocoat or Osmo) protects the surface while letting the wood’s history show through. If the wood is very rough or dirty, clean it with a wire brush, then seal with a wood conditioner before topcoating. Expect coverage of about 350–400 square feet per gallon for most penetrating oils.
Sourcing: Architectural salvage yards, Habitat for Humanity ReStores, and online marketplaces (Etsy, Facebook Marketplace) are good hunting grounds. Prices vary widely, $2–$8 per board foot depending on species, condition, and region. Budget extra time for sorting, cleaning, and milling.
Vintage-Inspired Island Designs with Modern Storage
You can capture farmhouse aesthetics without sacrificing the conveniences of modern cabinetry. Think antique hutch or dry sink on the outside, soft-close drawers and pull-out trash on the inside.
Cabinet construction: Use face-frame cabinetry with inset or partial-overlay doors. Inset doors sit flush with the frame and require more precise building (or a higher budget if you’re ordering custom), but they deliver that classic furniture look. Partial-overlay is easier to DIY and still reads traditional if you use beadboard panels and visible hinges.
Storage upgrades to consider:
• Deep drawers with dividers for pots, mixing bowls, or baking sheets
• Pull-out spice racks behind narrow doors
• Tilt-out trays at the top for sponges and scrubbers
• Vertical dividers for cutting boards and sheet pans
Paint the base in a flat or eggshell finish for an old-world matte look. Milk paint (like Old Fashioned Milk Paint or Miss Mustard Seed) creates authentic chalky texture and can be distressed easily. For durability in a high-traffic kitchen, topcoat milk paint with a water-based poly or furniture wax.
Hardware should feel hefty. Wrought iron or oil-rubbed bronze bin pulls, cup handles, or even leather straps give a nod to 19th-century farmhouse design without looking costume-y. Avoid tiny knobs, they get lost on wide drawer fronts and feel flimsy.
Butcher Block Countertops for Authentic Character
Butcher block is the quintessential farmhouse countertop material, warm, repairable, and functional for everything from chopping vegetables to rolling dough. It’s available in edge-grain (planks laid flat) and end-grain (wood fibers standing vertical). End-grain is gentler on knife edges and self-healing, but it’s pricier and requires regular oiling. Edge-grain is more affordable and still plenty durable for island use.
Common species include hard maple (dense, light color), walnut (rich brown, softer), and oak (traditional, prominent grain). Maple is the workhorse choice for cutting surfaces. Thickness ranges from 1.5″ to 3″, go at least 1.75″ for an island to minimize warping and provide enough meat for sanding down dings over the years.
Installation: Butcher block expands and contracts with humidity, so it needs room to move. Fasten it to the base with figure-eight fasteners or metal clips, not construction adhesive or screws driven tight through the top. Allow a 1/8″ gap around the perimeter if the block sits inside a frame or against walls.
Finishing: For a true work surface, use food-safe mineral oil or a blend like Boos Block conditioner (mineral oil + beeswax). Apply generously every few weeks at first, then monthly once the wood is saturated. If you want a more protective, low-maintenance finish and don’t plan to cut directly on the surface, use Waterlox Original (a tung oil-based sealer) or a water-based poly rated for countertops. Coverage is roughly 600 square feet per gallon for penetrating oils.
Avoid placing butcher block directly over a dishwasher without a moisture barrier underneath, steam and heat can warp the wood. If your island includes a sink, seal the underside of the cutout with multiple coats of poly or epoxy to prevent swelling.
Open Shelving and Display Options
Open shelving on one or both ends of an island creates visual lightness and puts everyday items within easy reach. It’s also a practical way to display crocks, mixing bowls, cookbooks, or a collection of vintage enamelware.
Shelf construction: For load-bearing open shelves, use 1×12 or 1×10 solid wood boards (actual dimensions: 3/4″ × 11.25″ or 3/4″ × 9.25″). Pine, poplar, or oak all work, just make sure the boards are straight and dry. Edge-band with hardwood trim or leave raw for a more rustic look.
Secure shelves with dadoes (routed grooves in the side panels) or adjustable shelf pins if you want flexibility. Dado joints are stronger and cleaner for permanent shelves. Rout a 3/4″-wide, 3/8″-deep groove, apply wood glue, and slide the shelf into place. If you don’t own a router, a table saw with a dado stack works too.
Styling tips: Keep everyday items front and center, stacked dinner plates, a row of glass jars with dry goods, or a wire basket of dish towels. Avoid clutter: farmhouse style is lived-in, not messy. Rotate items seasonally to keep the display fresh.
If open shelving feels too exposed, consider chicken wire cabinet doors. Stretch galvanized wire mesh over a routed frame, staple it in place, and trim with narrow molding. This adds texture and a vintage farm vibe while keeping dust off dishes. Many kitchen design resources feature this detail in modern farmhouse kitchens.
Clearance note: Make sure open shelves don’t create a tripping hazard or block walkways. Keep the lowest shelf at least 4–6″ off the floor to allow for foot clearance and to make sweeping easier.
DIY Farmhouse Island Projects on a Budget
Building your own farmhouse island saves hundreds compared to custom cabinetry and lets you tailor size, storage, and finishes to your exact needs. Here are three approachable builds.
Option 1: Stock cabinet base with DIY top
Buy a pair of unfinished or pre-primed base cabinets (24″ deep, 36″ tall) from a home center. Set them back-to-back or side-by-side, secure with screws through the cabinet sides, then add a plywood or butcher block top sized 12″ wider and longer than the cabinet footprint to create overhangs. Paint the cabinets, add hardware, and you’ve got a functional island for under $400 in materials.
Option 2: 2×4 frame with beadboard cladding
Build a rectangular frame from 2×4 studs (actual size 1.5″ × 3.5″), using pocket screws or lap joints at the corners. Add vertical supports every 16–24″ for rigidity. Clad the frame with beadboard panels (1/4″ plywood or MDF with vertical grooves), then cap with a simple pine or plywood countertop. This method is lightweight, inexpensive, and beginner-friendly. Total cost: $200–$300 depending on countertop choice.
Option 3: Repurposed furniture
Scout thrift stores or estate sales for an old dresser, sideboard, or desk with good bones. Strip or paint the finish, replace the top with butcher block or a DIY concrete pour, and add casters if you want mobility. This approach delivers one-of-a-kind character and often costs less than $250 all-in. Make sure the piece is solid wood, not particleboard, and check drawer glides, you may need to replace them for smooth operation.
Tools you’ll need: Circular saw or miter saw, drill/driver, pocket hole jig (for cabinet option), orbital sander, level, and clamps. If you’re adding a butcher block top, a random-orbit sander and edge router make finishing easier.
Permit check: Adding an island with plumbing or electrical requires permits in most jurisdictions. A standalone furniture-style island with no utilities does not. If you’re running a new circuit for outlets or adding a sink, consult local code and consider hiring a licensed electrician or plumber for those portions.
For more design inspiration and material sourcing, browse online galleries and note dimensions, finishes, and hardware details that match your vision.
Conclusion
A farmhouse kitchen island doesn’t have to mean reclaimed barn beams and a five-figure budget. Whether you’re cladding stock cabinets in beadboard, milling your own butcher block, or hunting down vintage furniture to repurpose, the key is choosing natural materials, honest finishes, and details that feel handmade. Measure twice, plan for adequate clearance, and don’t skip surface prep, those steps make the difference between a project that looks DIY in a bad way and one that feels like it’s been there for decades.


