
The entryway sets the tone for the rest of a home, and right now, it’s getting more design attention than ever. An accent wall transforms this often-overlooked space from a pass-through zone into a deliberate, welcoming first impression. Unlike living rooms or bedrooms, entryways rarely need to serve multiple functions, which gives homeowners freedom to take design risks. Whether someone’s working with a narrow hallway entry or a spacious foyer, a well-executed accent wall adds personality without requiring a room-wide commitment. The best part? Most of these projects fall squarely in DIY territory, requiring more planning than skill.
Table of Contents
ToggleKey Takeaways
- Entryway accent wall ideas offer homeowners an ideal opportunity to take design risks in a transitional space that doesn’t require full-room commitment.
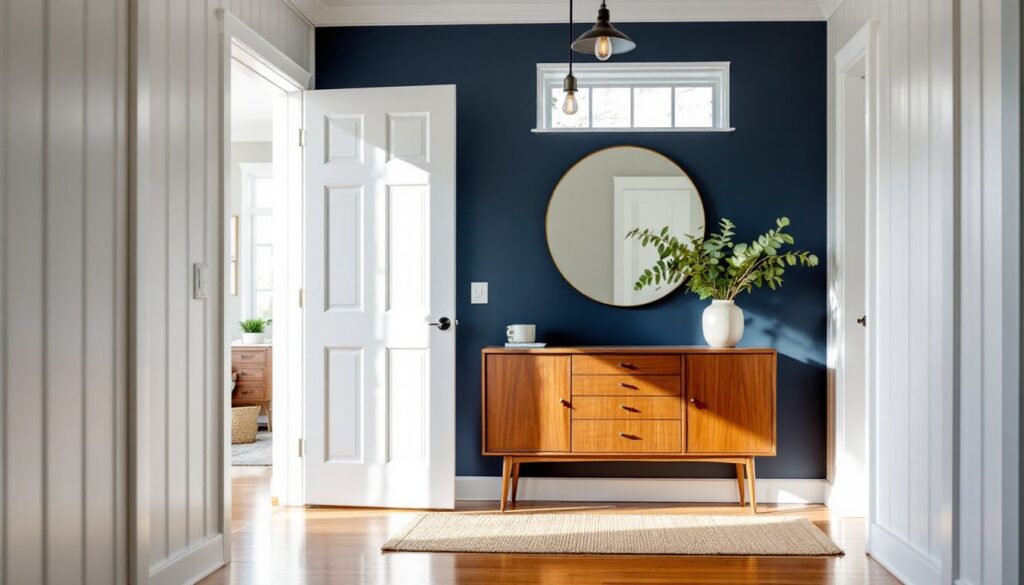
- Paint is the most accessible and reversible option for accent walls, with deep saturated hues like navy and charcoal delivering maximum drama for minimal cost.
- Textured treatments like shiplap, 3D panels, and decorative molding add visual depth and tactile interest, with most materials costing $1.50–$25 per square foot.
- Modern wallpaper and peel-and-stick options provide bold graphics and patterns for renters or design-focused homeowners testing commitments before permanence.
- Masonry materials like stone veneer, brick, and tile create high-impact, long-lasting accent walls but require advanced installation skills and proper load-bearing verification.
- Most entryway accent wall projects are DIY-achievable weekend tasks, with success depending more on planning and design mapping than carpentry expertise.
Why an Accent Wall Works Perfectly in Your Entryway
Entryways occupy a unique position in home design. They’re the first thing guests see, but they’re also transitional spaces that don’t demand the same functional considerations as kitchens or bathrooms. This makes them ideal testing grounds for bold choices.
An accent wall focuses visual attention without overwhelming the space. In a narrow entry, it can create the illusion of depth when placed on the short wall at the end of the corridor. In larger foyers, it anchors the room and gives the eye a place to land. Unlike full-room treatments, an accent wall keeps material costs manageable, important when experimenting with higher-end finishes like reclaimed wood or stone veneer.
From a practical standpoint, entryway walls take less wear than high-traffic zones, so materials that might be impractical elsewhere (like grasscloth wallpaper or delicate 3D panels) can work here. The space is also typically small enough to complete in a weekend, making it approachable for intermediate DIYers.
One structural note: If the accent wall is load-bearing and the project involves removing drywall or adding heavy materials like stacked stone, consult local building codes. Most cosmetic treatments won’t trigger permit requirements, but adding significant weight may require fastening into studs and verifying wall capacity.
Bold Paint Colors and Patterns That Make a Statement
Paint remains the most accessible accent wall option, low cost, reversible, and endlessly customizable. The key is choosing colors that complement adjacent rooms while making a clear statement.
Deep, saturated hues like charcoal, navy, forest green, or terracotta create drama without requiring additional materials. These work especially well in entries with good natural light: in dimmer spaces, they can feel cave-like. One gallon of quality paint (around 400 square feet of coverage) is usually enough for a standard entryway wall with two coats. Sherwin-Williams Emerald or Benjamin Moore Aura offer excellent coverage and durability for high-traffic areas.
For geometric patterns, painter’s tape and a level are essential. Horizontal stripes can make a narrow entry feel wider, while vertical stripes add height. Chevrons and color-blocked sections require more planning, map the design on graph paper first, then transfer measurements to the wall using a chalk line. A laser level (under $30 for a basic model) makes this dramatically easier than a bubble level.
Ombre effects and gradients are trending but require blending wet paint, which takes practice. Test the technique on poster board first. Stenciled patterns, Moroccan tiles, oversized florals, or mid-century shapes, offer a compromise between hand-painting and wallpaper. Cut stencils from Mylar sheets for durability, and use a foam roller or stencil brush to prevent paint bleed.
Always use primer on fresh drywall or when going from light to dark colors. Tinted primer matching the finish coat cuts down on the number of topcoats needed. For high-contrast designs, prime the entire wall in the lighter color first, then tape and paint the darker sections.
Textured Wall Treatments for Added Dimension
Texture adds visual weight and tactile interest that flat paint can’t match. These treatments range from straightforward to intermediate carpentry projects.
Shiplap, Board and Batten, and Wood Paneling
Shiplap has staying power because it’s genuinely versatile and relatively simple to install. Real shiplap uses boards with a rabbet joint that overlaps, but most DIYers use ½-inch or ⅝-inch plywood ripped into 6- to 8-inch planks with a nickel-width gap between courses. A table saw or circular saw with a straightedge guide handles the ripping: a miter saw cleans up the ends.
Fasten planks directly to wall studs (located with a stud finder) using 18-gauge brad nails and construction adhesive. Start from the bottom and work up, checking level every few courses. Paint before or after installation, pre-painting is faster, but post-painting gives a seamless look. Expect to spend $1.50–$3 per square foot for materials.
Board and batten creates a classic grid pattern using 1×2 or 1×3 boards (actual dimensions: ¾” × 1.5″ or ¾” × 2.5″) applied over a painted base wall. Plan the layout so vertical battens are evenly spaced, typically 12 to 18 inches apart. Use a combination square to ensure corners are true 90-degree angles. This treatment works especially well in farmhouse or transitional styles.
Wood paneling, think walnut, oak, or cedar planks, elevates the look but increases cost and complexity. Tongue-and-groove planks need to acclimate to indoor humidity for 48–72 hours before installation to prevent gaps or buckling. Fasten to horizontal furring strips or directly to studs, depending on plank thickness. Finish with polyurethane or a penetrating oil to protect the wood and bring out grain.
3D Wall Panels and Decorative Molding
Pre-fabricated 3D wall panels (made from MDF, PVC, or plant fiber) add geometric depth without custom carpentry. Panels typically come in 2×2-foot squares and install with panel adhesive and finishing nails. Popular patterns include waves, hexagons, and stacked cubes. Companies like Art3d and WallArt offer panels starting around $15–$25 per panel.
Cut panels with a fine-tooth handsaw or jigsaw to fit around outlets and edges. Sand cut edges lightly and fill seams with lightweight spackling compound. Most panels come primed and ready to paint: a foam roller prevents texture loss that brushes can cause.
Decorative molding, picture frame molding, wainscoting caps, or shadow boxes, adds traditional elegance. Use a miter saw for precise 45-degree corner cuts (a miter box and handsaw works but requires patience). Pre-drill nail holes in hardwood molding to prevent splitting. A 15- or 16-gauge finish nailer speeds up installation and provides better holding power than brads.
Both treatments benefit from caulking seams and nail holes before painting. Use painter’s caulk (not silicone) for paintable joints.
Wallpaper and Removable Options for Renters
Wallpaper has evolved far beyond grandma’s kitchen florals. Modern options include bold graphics, textured grasscloth, and metallics that work in contemporary spaces. For renters or commitment-phobes, peel-and-stick wallpaper offers the look without the permanence.
Traditional paste-the-wall or pre-pasted wallpaper delivers the most durable finish. Vinyl-coated papers are scrubbable, important in an entry where walls get touched. Grasscloth and linen wallpapers add organic texture but show seams more obviously and can’t be wiped clean. Budget $30–$150 per roll (covering roughly 25–30 square feet after pattern matching).
Installation requires a plumb line (use a laser level or chalk line), smoothing brush, and utility knife. Start in the least visible corner and work outward. Match patterns at seams carefully: a mismatch is immediately obvious. Homeowners comfortable with DIY furniture projects will find wallpapering within reach, though the first panel always takes longer than expected.
Peel-and-stick (removable) wallpaper uses a repositionable adhesive that won’t damage drywall when removed. Quality varies widely, cheap versions don’t stick well or leave residue. Look for options from Tempaper, RoomMates, or Chasing Paper. Application is similar to traditional wallpaper but more forgiving: bubbles can be smoothed out and panels repositioned.
The trade-off: peel-and-stick doesn’t last as long (3–5 years vs. 10+ for traditional) and costs more per square foot ($40–$80 per roll). It’s ideal for renters or anyone testing a bold pattern before committing. Surface prep matters, walls must be clean, smooth, and fully cured. Freshly painted walls need 30 days to off-gas before application.
For high-impact entryways, many designers recommend wallpaper with large-scale patterns to create visual interest without overwhelming small spaces. A single accent wall keeps the look intentional rather than busy.
Creative Materials: Stone, Brick, and Tile Accents
For homeowners ready to commit to permanence, masonry and tile accents bring texture and value that lighter materials can’t match.
Stone veneer, thin-cut natural stone or manufactured stone panels, adds upscale texture. Real stone veneer (slate, quartzite, limestone) runs $8–$20 per square foot: manufactured versions (concrete molded to mimic stone) cost $5–$12. Both require a mortar base and grout, making this a more advanced project.
Start by installing metal lath over moisture-resistant drywall or cement board. Apply a scratch coat of mortar, let it cure, then butter each stone piece and press into place. Use spacers to maintain consistent grout lines. A wet tile saw handles cuts: wear safety goggles and a dust mask, stone dust is a respiratory hazard. Seal natural stone after grouting to prevent staining.
Brick veneer (thin brick tiles) creates an industrial or rustic look. Real brick tiles offer authentic texture but weigh more and cost more than faux options. Installation mirrors stone veneer, mortar, spacers, grout, seal. Homeowners inspired by budget renovation ideas often use brick veneer as a high-impact, DIY-friendly alternative to full masonry walls.
Ceramic or porcelain tile brings pattern flexibility, subway tile, hexagons, zellige, or encaustic patterns. Tile works especially well in entries near exterior doors where moisture and dirt are concerns. Use thin-set mortar and a notched trowel (¼” × ¼” notches for most wall tile). A tile cutter or wet saw makes clean cuts: nippers handle small notches around outlets.
Always start with a level reference line and work upward. Use tile spacers for consistent grout lines (⅛” is standard for wall tile). Let thin-set cure 24–48 hours before grouting. Unsanded grout works for joints under ⅛”: sanded grout for wider joints. Seal grout after it cures to resist stains.
All three materials add significant weight. Verify that drywall is fastened securely to studs: for large installations or weaker walls, add blocking or sister studs for reinforcement. Building codes may require cement board backing in load-bearing or moisture-prone areas, check local IRC requirements.
Safety note: Cutting stone and tile generates silica dust, a known carcinogen. Always wet-cut when possible, work outdoors or in a well-ventilated area, and wear an N95 or P100 respirator, not a basic dust mask.
These treatments aren’t reversible like paint or wallpaper, so homeowners should be confident in their choice. The upside? Done right, they last decades and add measurable resale value.


