
Replacing flooring can overhaul a room’s look faster than almost any other upgrade, and doing it yourself cuts labor costs by 40-60%. In 2026, DIY-friendly flooring options have never been more accessible, with click-lock systems, peel-and-stick formats, and improved subfloor prep materials making professional-looking results achievable for intermediate skill levels. Whether tackling a rental-friendly bedroom update or a full kitchen remodel, the right flooring choice balances installation difficulty, durability, and upfront cost. This guide covers four proven DIY flooring types, from foolproof adhesive tiles to creative painted finishes, plus the tools and prep steps that separate a weekend win from a month-long redo.
Table of Contents
ToggleKey Takeaways
- DIY flooring installation saves 40–60% in labor costs while modern click-lock and peel-and-stick systems enable professional-looking results for intermediate skill levels.
- Peel-and-stick vinyl tiles and luxury vinyl planks are beginner-friendly options that require minimal specialized skills and can be completed in a weekend for a 200-square-foot room.
- Proper subfloor preparation—leveling, cleaning, and moisture testing—is critical for DIY flooring success, as vinyl and laminate will reveal every imperfection.
- Laminate flooring is budget-friendly at $1.50–$4 per square foot but isn’t waterproof, while LVP’s 100% waterproof design makes it ideal for kitchens, bathrooms, and basements.
- Painted floor designs offer creative, cost-effective alternatives for renters and experimental spaces when sealed with 3–4 coats of water-based polyurethane for durability.
- Avoid common pitfalls like skipping expansion gaps, forgetting seam staggering, and rushing layout—the first row must be square to prevent compounding errors throughout the installation.
Why Choose DIY Flooring for Your Home
Labor costs for professional flooring installation typically run $3-$8 per square foot depending on material and region, which can double the total project expense. Tackling installation yourself keeps budgets lean and gives control over timing, no waiting weeks for contractor availability.
Modern floating floors and adhesive systems require minimal specialized skills. Click-lock luxury vinyl planks and peel-and-stick tiles eliminate the need for glue trowels, nails, or complex transitions. Most DIYers with basic measuring and cutting skills can handle a 200-square-foot room in a weekend.
DIY flooring also makes sense for renters or frequent remodelers. Temporary options like vinyl tiles or painted plywood subfloors can be removed or refinished without permanent structural changes. That flexibility lets homeowners experiment with bold patterns or budget materials before committing to high-end hardwood or tile.
That said, some scenarios demand a pro. Subfloor repair involving joists or structural concerns, moisture mitigation in basements, and large-format tile (which requires laser-level precision and heavy mortar work) often justify hiring licensed installers. If the existing floor shows significant unevenness (more than 3/16″ over 10 feet), self-leveling compound or plywood overlay may be necessary, tasks that benefit from experience.
Peel-and-Stick Vinyl Tiles: The Beginner-Friendly Option
Peel-and-stick vinyl tiles (also called self-adhesive tiles) are the gateway drug for first-time floor installers. They require no adhesive mixing, no acclimation period, and forgive minor layout mistakes since individual tiles lift and reposition within the first few minutes.
Material specs: Standard tiles measure 12″×12″ or 12″×24″, with a wear layer ranging from 6-mil (light residential) to 20-mil (commercial-grade). For kitchens and bathrooms, choose tiles rated for moisture exposure and at least 12-mil wear layers to resist scuffs.
Installation basics: Start by cleaning the subfloor thoroughly, any dust, wax, or grease will prevent adhesion. Snap chalk lines at the room’s center to establish square layout lines. Peel the backing and press each tile firmly, rolling with a 100-pound floor roller (rentable for about $20/day) to eliminate air pockets. Butt edges tightly: gaps invite dirt and moisture.
Cutting is dead simple: score with a utility knife and straightedge, then snap along the line. For curves around toilets or doorframes, create a cardboard template first.
The biggest pitfall? Skipping subfloor prep. Vinyl telegraphs every imperfection, so sand down high spots and fill low areas with floor patch compound. Allow 24 hours for the adhesive to cure before walking on it heavily or replacing furniture.
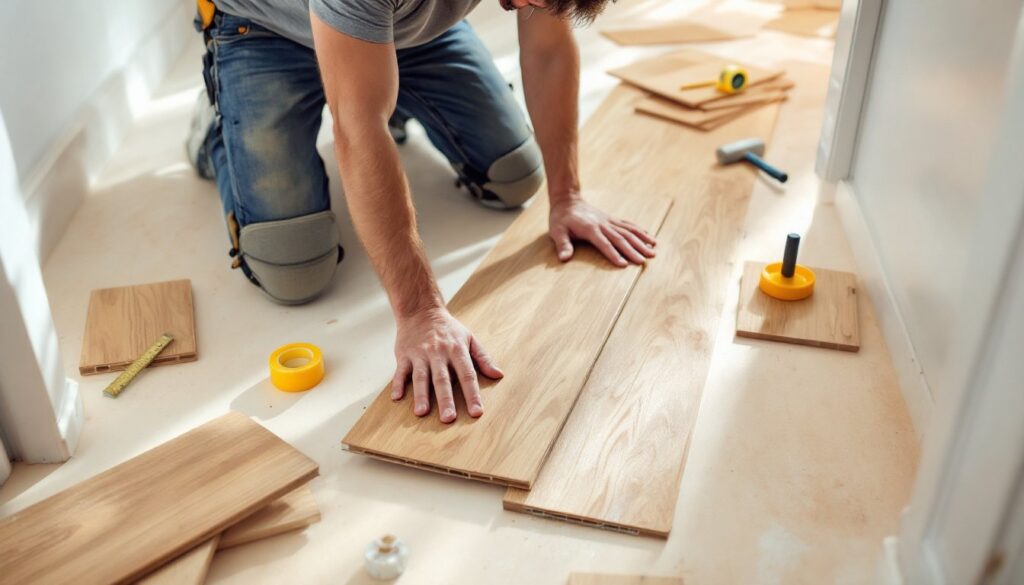
Luxury Vinyl Plank: Affordable Elegance You Can Install Yourself
Luxury vinyl plank (LVP) mimics hardwood with photorealistic grain patterns and embossed textures, but costs $2-$5 per square foot compared to $6-12 for engineered hardwood. It’s 100% waterproof (not just water-resistant), making it ideal for basements, laundry rooms, and kitchens.
Most LVP uses a click-lock floating system: planks snap together at tongue-and-groove edges without glue or nails, floating over an underlayment pad. This also means it’s removable, a win for renters or anyone planning future upgrades.
Installation walkthrough:
- Acclimate planks for 48 hours in the installation room (even though LVP is dimensionally stable, this prevents expansion issues).
- Roll out 2mm foam underlayment with vapor barrier if installing over concrete. Tape seams with moisture-resistant tape.
- Start along the longest wall, leaving a ¼-inch expansion gap at all edges (use spacers). Stagger end joints by at least 6 inches between rows to avoid an H-pattern, which weakens the floor.
- Cut planks face-up with a utility knife (score and snap) or a miter saw for cleaner edges.
- Tap planks into place with a rubber mallet and tapping block, never hammer directly on the edge.
LVP handles foot traffic immediately after installation, but wait 24 hours before moving heavy appliances back. Transitions to tile or carpet require T-molding or reducers: don’t butt materials directly together.
One caution: cheaper LVP (under $2/sq ft) often has thin wear layers that scratch easily and minimal UV resistance, leading to fading near windows. Spend the extra dollar per foot for a 20-mil wear layer and a urethane topcoat.
Laminate Flooring: Durable and Budget-Conscious
Laminate flooring layers a photographic image over high-density fiberboard (HDF), sealed with a tough melamine wear layer. It’s less expensive than LVP, $1.50-$4 per square foot, and handles scratches and dents better, making it a go-to for homes with pets or kids.
Unlike LVP, laminate is not waterproof. Spills must be wiped immediately, and it’s a poor choice for full bathrooms or below-grade basements prone to humidity. The HDF core swells if soaked, causing permanent buckling.
Installation mirrors LVP’s click-lock approach: floating floor, underlayment pad (with built-in moisture barrier if over concrete), ¼-inch expansion gaps, and staggered seams. Laminate planks are slightly more rigid than vinyl, so tapping them together requires a firm hand and a pull bar for the last row.
Cutting laminate generates fine dust, wear a dust mask and use a carbide-tipped blade in your circular or miter saw. The melamine layer dulls standard blades fast.
AC rating (Abrasion Criteria) indicates durability: AC3 suits moderate residential use, AC4 handles heavy residential or light commercial, and AC5 is commercial-grade. Don’t cheap out on AC1 or AC2 for main living areas: they’ll show wear in under five years.
Laminate’s Achilles’ heel is moisture and the hollow sound underfoot. A quality underlayment (at least 3mm with sound-dampening) reduces that plasticky echo. Some manufacturers now offer water-resistant (not waterproof) laminate with sealed cores, worth the upgrade for kitchens.
Creative Painted Floor Designs for Unique Spaces
Painted floors turn subfloors, plywood, or even old hardwood into statement pieces for $0.50-$2 per square foot. They’re especially popular for porches, workshops, attics, and rental spaces where permanent flooring isn’t feasible. Bloggers sharing painted floor tutorials often showcase bold geometric patterns and stenciled designs that rival high-end tile.
Best candidates for paint:
- Plywood subfloors (sanded smooth, seams filled)
- Tongue-and-groove pine or fir planks common in older homes
- Concrete (requires etching or bonding primer)
Step-by-step process:
- Prep ruthlessly. Sand bare wood to 120-grit smoothness. Fill gaps and nail holes with wood filler. Vacuum, then wipe with tack cloth. Concrete needs degreasing and an acid etch or concrete bonding primer.
- Prime with a stain-blocking primer (oil-based for bleed-through issues like knots: latex for speed). Two coats on raw wood.
- Base coat: Use porch-and-floor enamel or 100% acrylic latex in satin or semigloss. These formulations resist scuffing better than wall paint. Two coats minimum.
- Design layer (optional): Tape off stripes, diamonds, or checkerboards with painter’s tape (FrogTape works well on smooth surfaces). Stencils add florals or geometric motifs. Work in thin coats to prevent bleed-under.
- Seal with 3-4 coats of water-based polyurethane (satin or semigloss). This is non-negotiable, paint alone won’t survive foot traffic. Recoat every 12-18 months in high-traffic zones.
Expect a 72-hour cure before replacing furniture. Painted floors won’t match hardwood’s longevity, but they’re unbeatable for rental-friendly style or experimental budget makeovers. Use rugs in heavy-wear paths to extend life.
Pro tip: Skip glossy finishes. They show every scuff and feel slippery. Satin polyurethane balances durability and slip resistance.
Essential Tools and Preparation Tips for DIY Flooring Success
Most flooring failures trace back to rushed prep or missing tools. Here’s what you actually need, and what separates a smooth install from a frustrating one.
Core tool list:
- Tape measure and carpenter’s square (check squareness before layout)
- Chalk line for snapping reference lines
- Utility knife with extra blades (for vinyl): miter saw or circular saw with fine-tooth blade (for laminate/LVP)
- Rubber mallet and tapping block (protects plank edges)
- Pull bar for the last row of click-lock floors
- ¼-inch spacers (maintain expansion gaps)
- 100-pound floor roller (rental: critical for peel-and-stick)
- Knee pads, you’ll thank yourself after hour two
Safety gear: Safety glasses (always when cutting), dust mask or respirator (laminate dust, paint fumes), gloves (handling sharp-edged planks or solvents).
Subfloor prep checklist:
- Level check: Use a 6-foot level or straightedge. High spots over 3/16″ in 10 feet need sanding: low spots require floor patch compound.
- Moisture test: Tape a 2’×2′ plastic sheet to concrete for 24 hours. Condensation underneath means you need a vapor barrier or waterproof underlayment.
- Clean thoroughly: Sweep, vacuum, then damp-mop. Residual construction dust kills adhesive bonds.
- Acclimate materials: Even “stable” products benefit from 48 hours in the install environment at 65-75°F.
Common mistakes to avoid:
- Skipping expansion gaps (floors buckle when they can’t expand)
- Forgetting to stagger seams (creates weak points)
- Installing over damaged subfloor (fix squeaks and replace soft spots first)
- Rushing the first row, if it’s not square, every subsequent row compounds the error
For detailed DIY flooring guides, look for bloggers who document mistakes openly: those walkthroughs tend to include the troubleshooting details that official instructions omit.
If installing over radiant heat, confirm your flooring is rated for it. Not all LVP and laminate handle temperature fluctuations without warping.
Conclusion
DIY flooring transforms spaces without the contractor markup, but success hinges on matching material to skill level and use case. Peel-and-stick vinyl suits beginners and renters, LVP balances durability with water resistance, laminate offers budget toughness, and painted floors deliver creative freedom for temporary or low-traffic areas. Invest time in subfloor prep and layout, those hours pay back in a floor that looks intentional, not improvised.


